Fun with lasers and tiny robots
Project update! This is my first attempt at producing a miniature super-cheap [swerve drive][swerve] based robot. Swerve drives are a very cool mechanical construction that let you have full 360 degree rotation without sacrificing forward power like other omni-wheel schemes. They’re pretty complex parts though, requiring a lot of custom machining, gearing, and heavily loaded bearings. So, they’re not cheap. So, my first thought was to design a super-tiny and super-cheap one!
 This idea was largely inspired by some of the FIRST team’s during the last season. Watching some of the robots maneuver with these fancy drive trains was pretty amazing, and so our team decided naturally that they would build thier own. But, the wrench in the works is that these are very complicated drive systems to program for. As the drive mentor, that means waiting. I’m not keen on that, so I proposed that the team also design some swerve drives that the programming team can have several of to play with. That gives everyone the freedom to learn wherever they are, and really collaborate during the summer off-season. Plus, it gives me a good chance to collaborate on a tiny laser swerve! Wins for everyone!
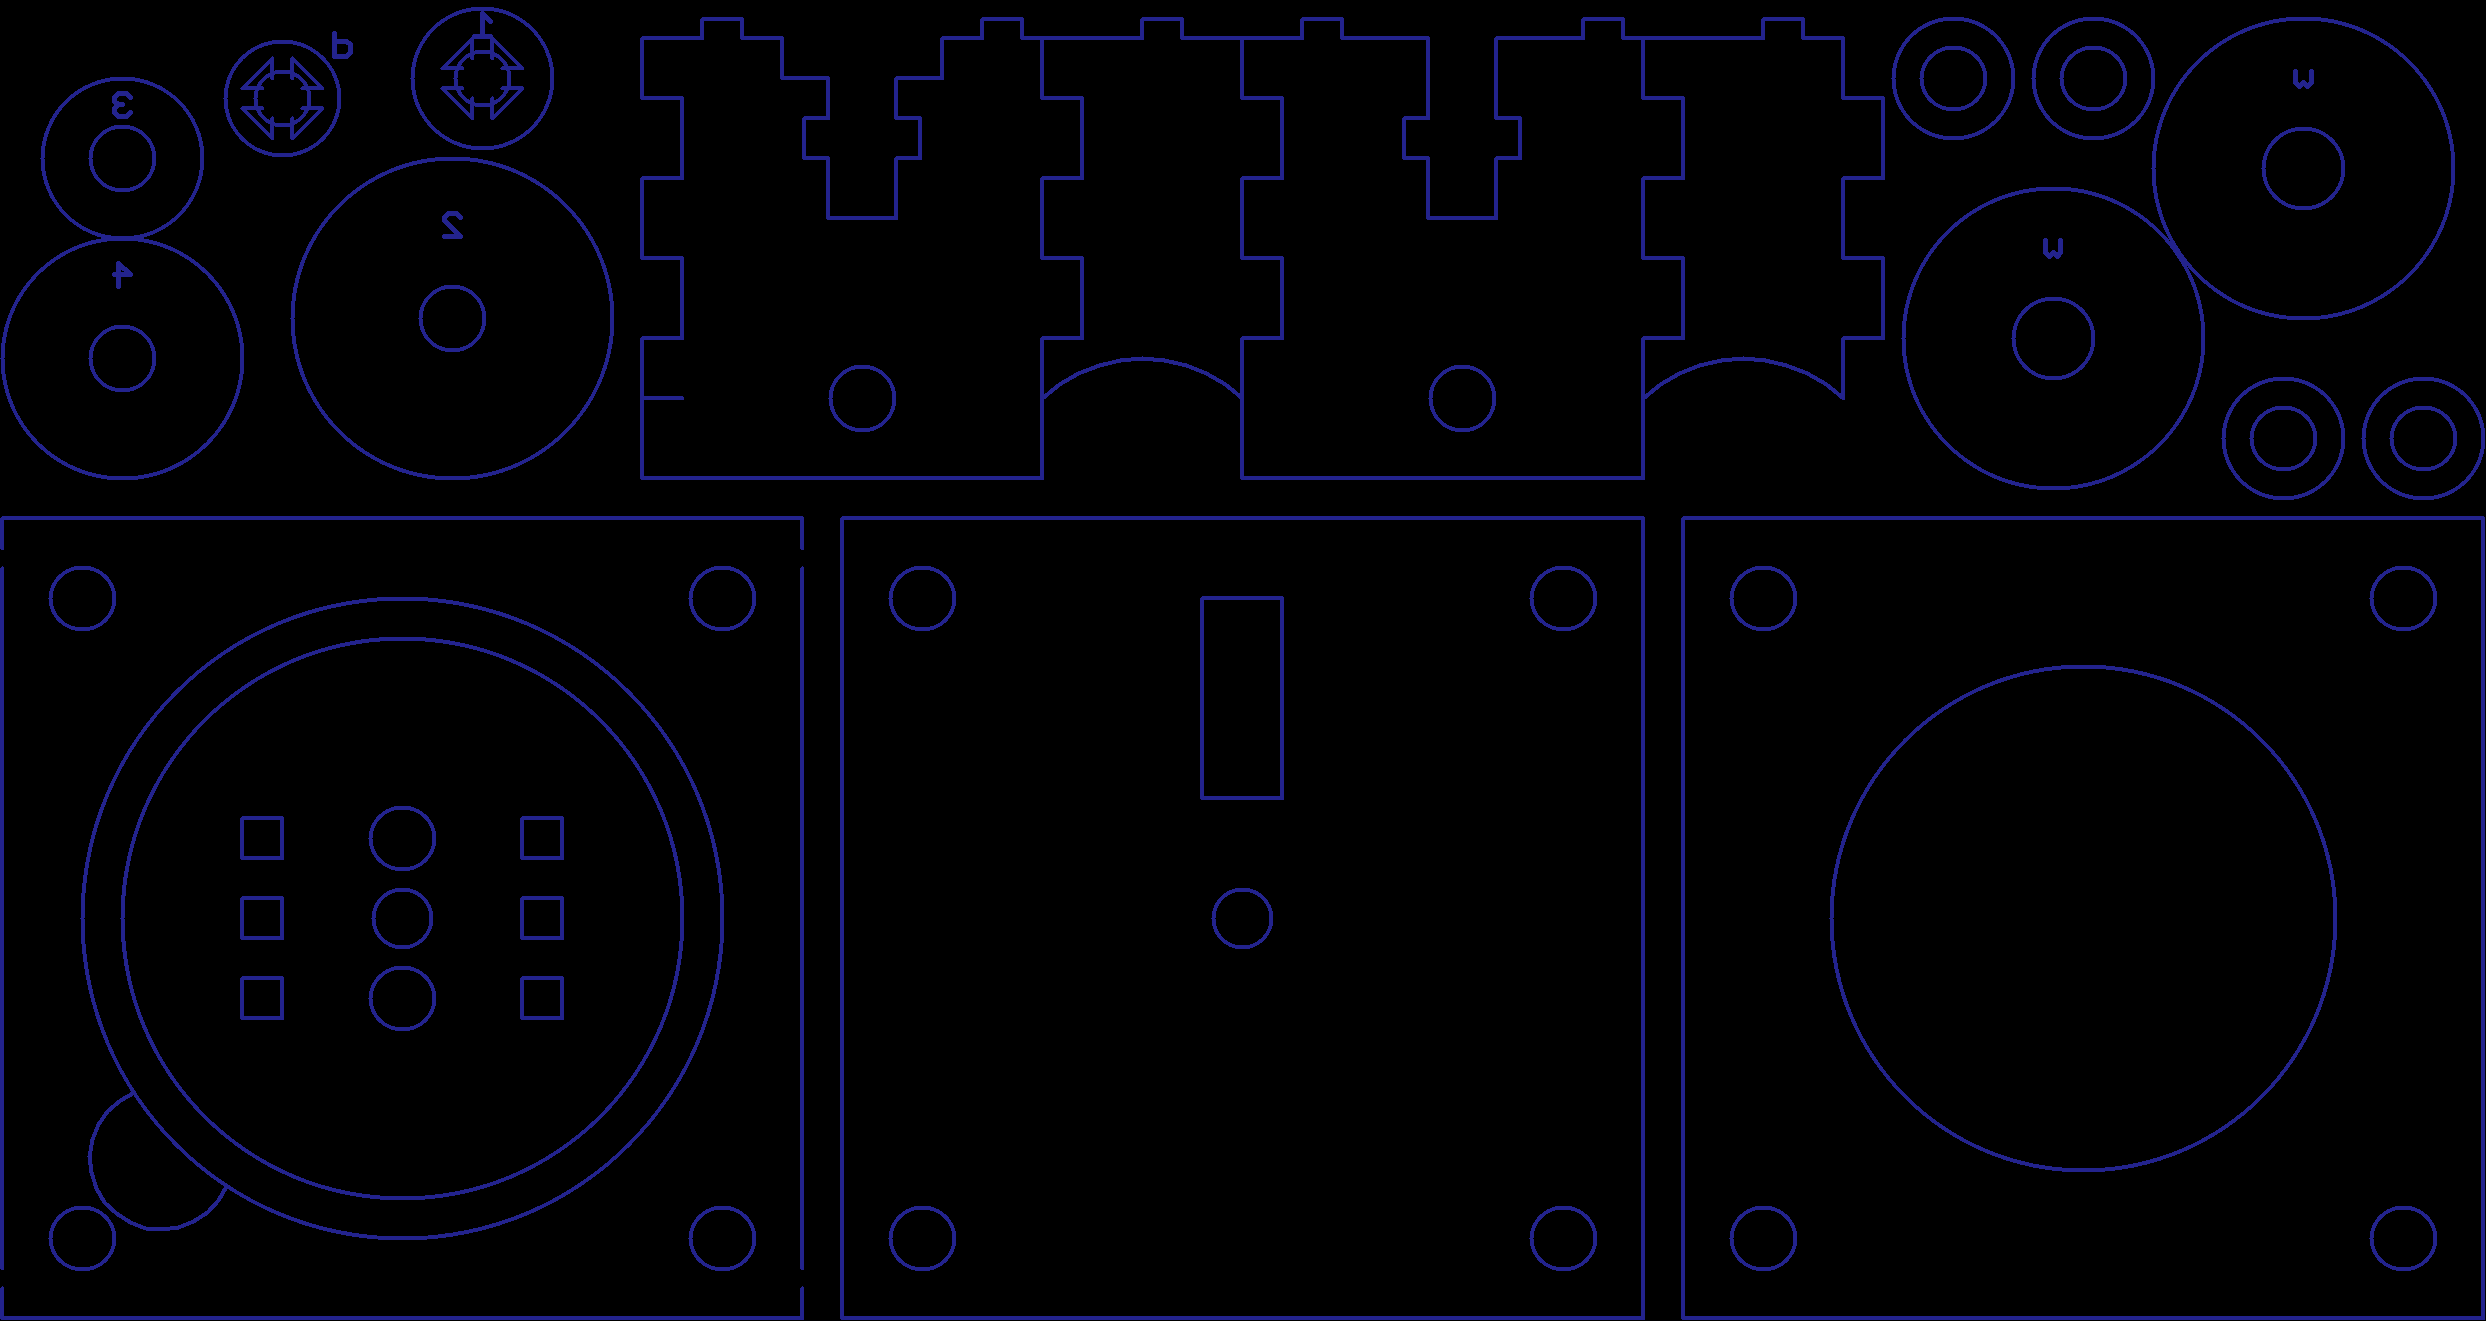 So, having failed to get gears made effectively in Inventor, I sketched it up in 30 minutes in Eagle. The nice thing about having trained a bit as a old-school drafter is you can do quite a bit with just lines and a bit of creativity. If you can visualize the whole 3D object as 2D parts, it’s pretty easy to just lay it out from the start, and skip the whole modelling bit. The other reason is that while Inventor makes it a bit tricky to actually get SVG or DXF drawings out of a 3D model. Eagle is a bit easier; since it’s already a 2D format it’s easy to get something to feed to our laser cutter.
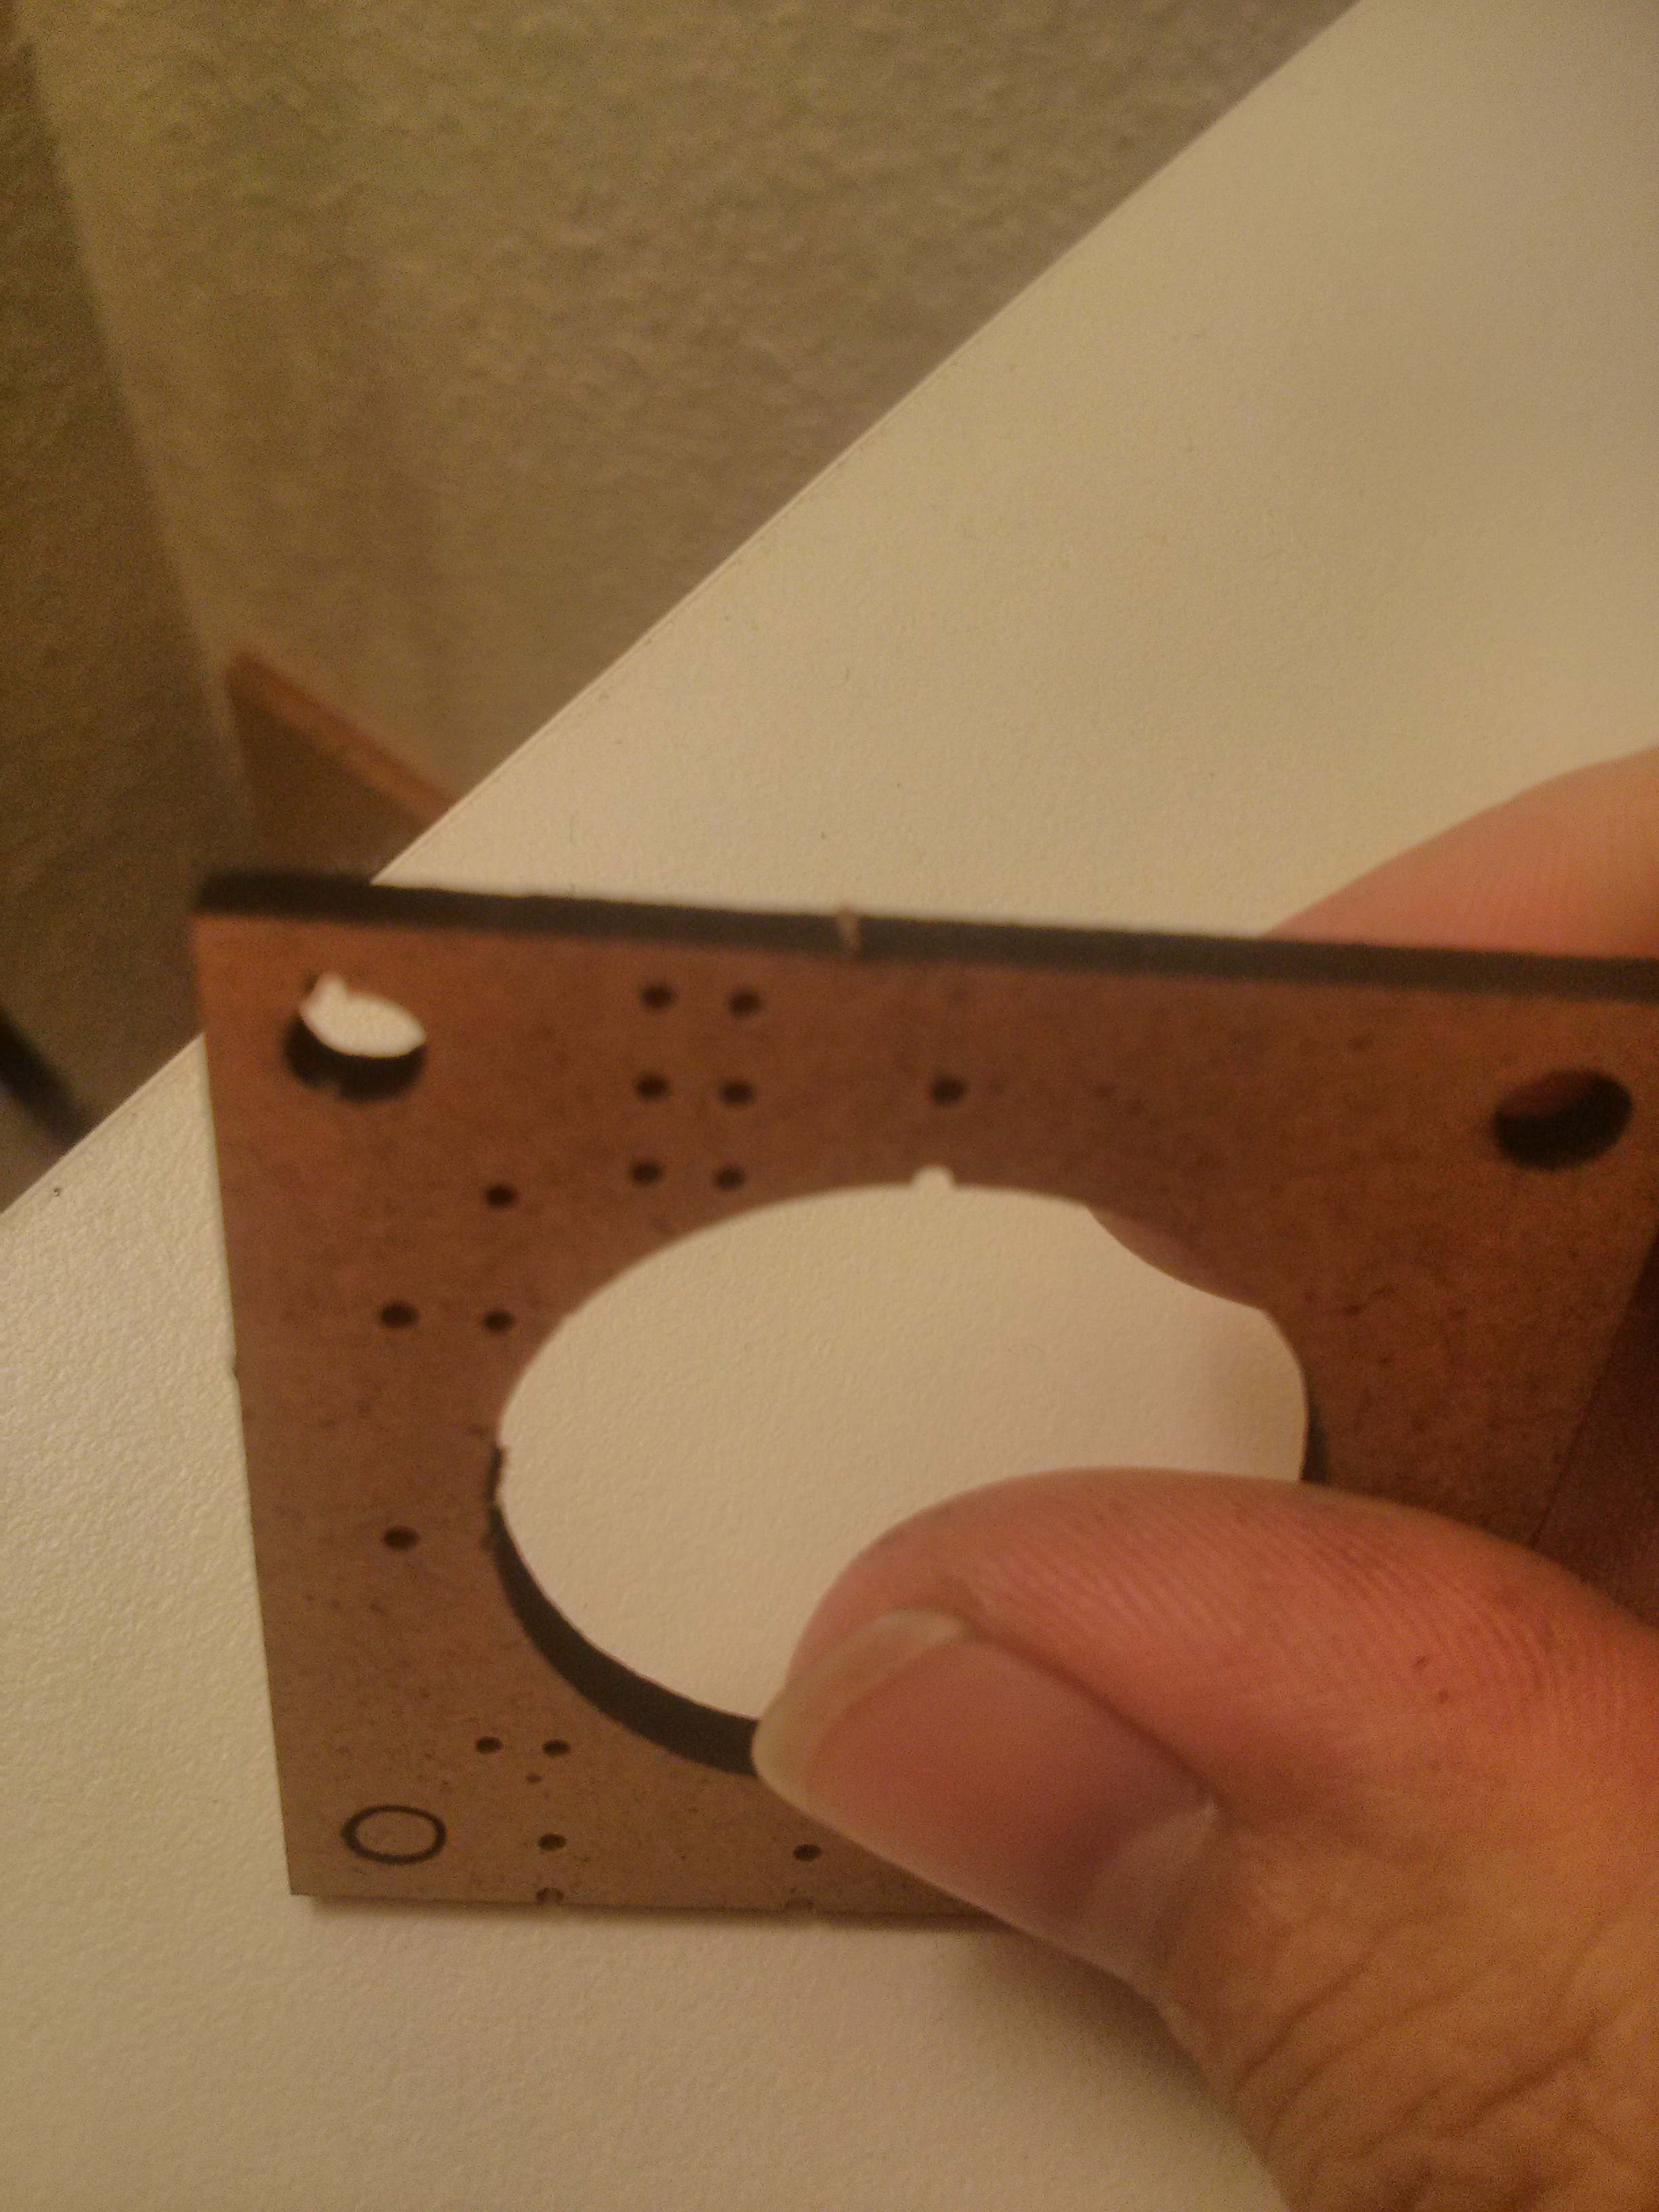
 And, out pops the glorious output. After of course, the horrible output that wasn’t at all usable due to some mis-calculations on my part. But now it’s mostly OK, so we don’t talk about that part. Here’s the build!
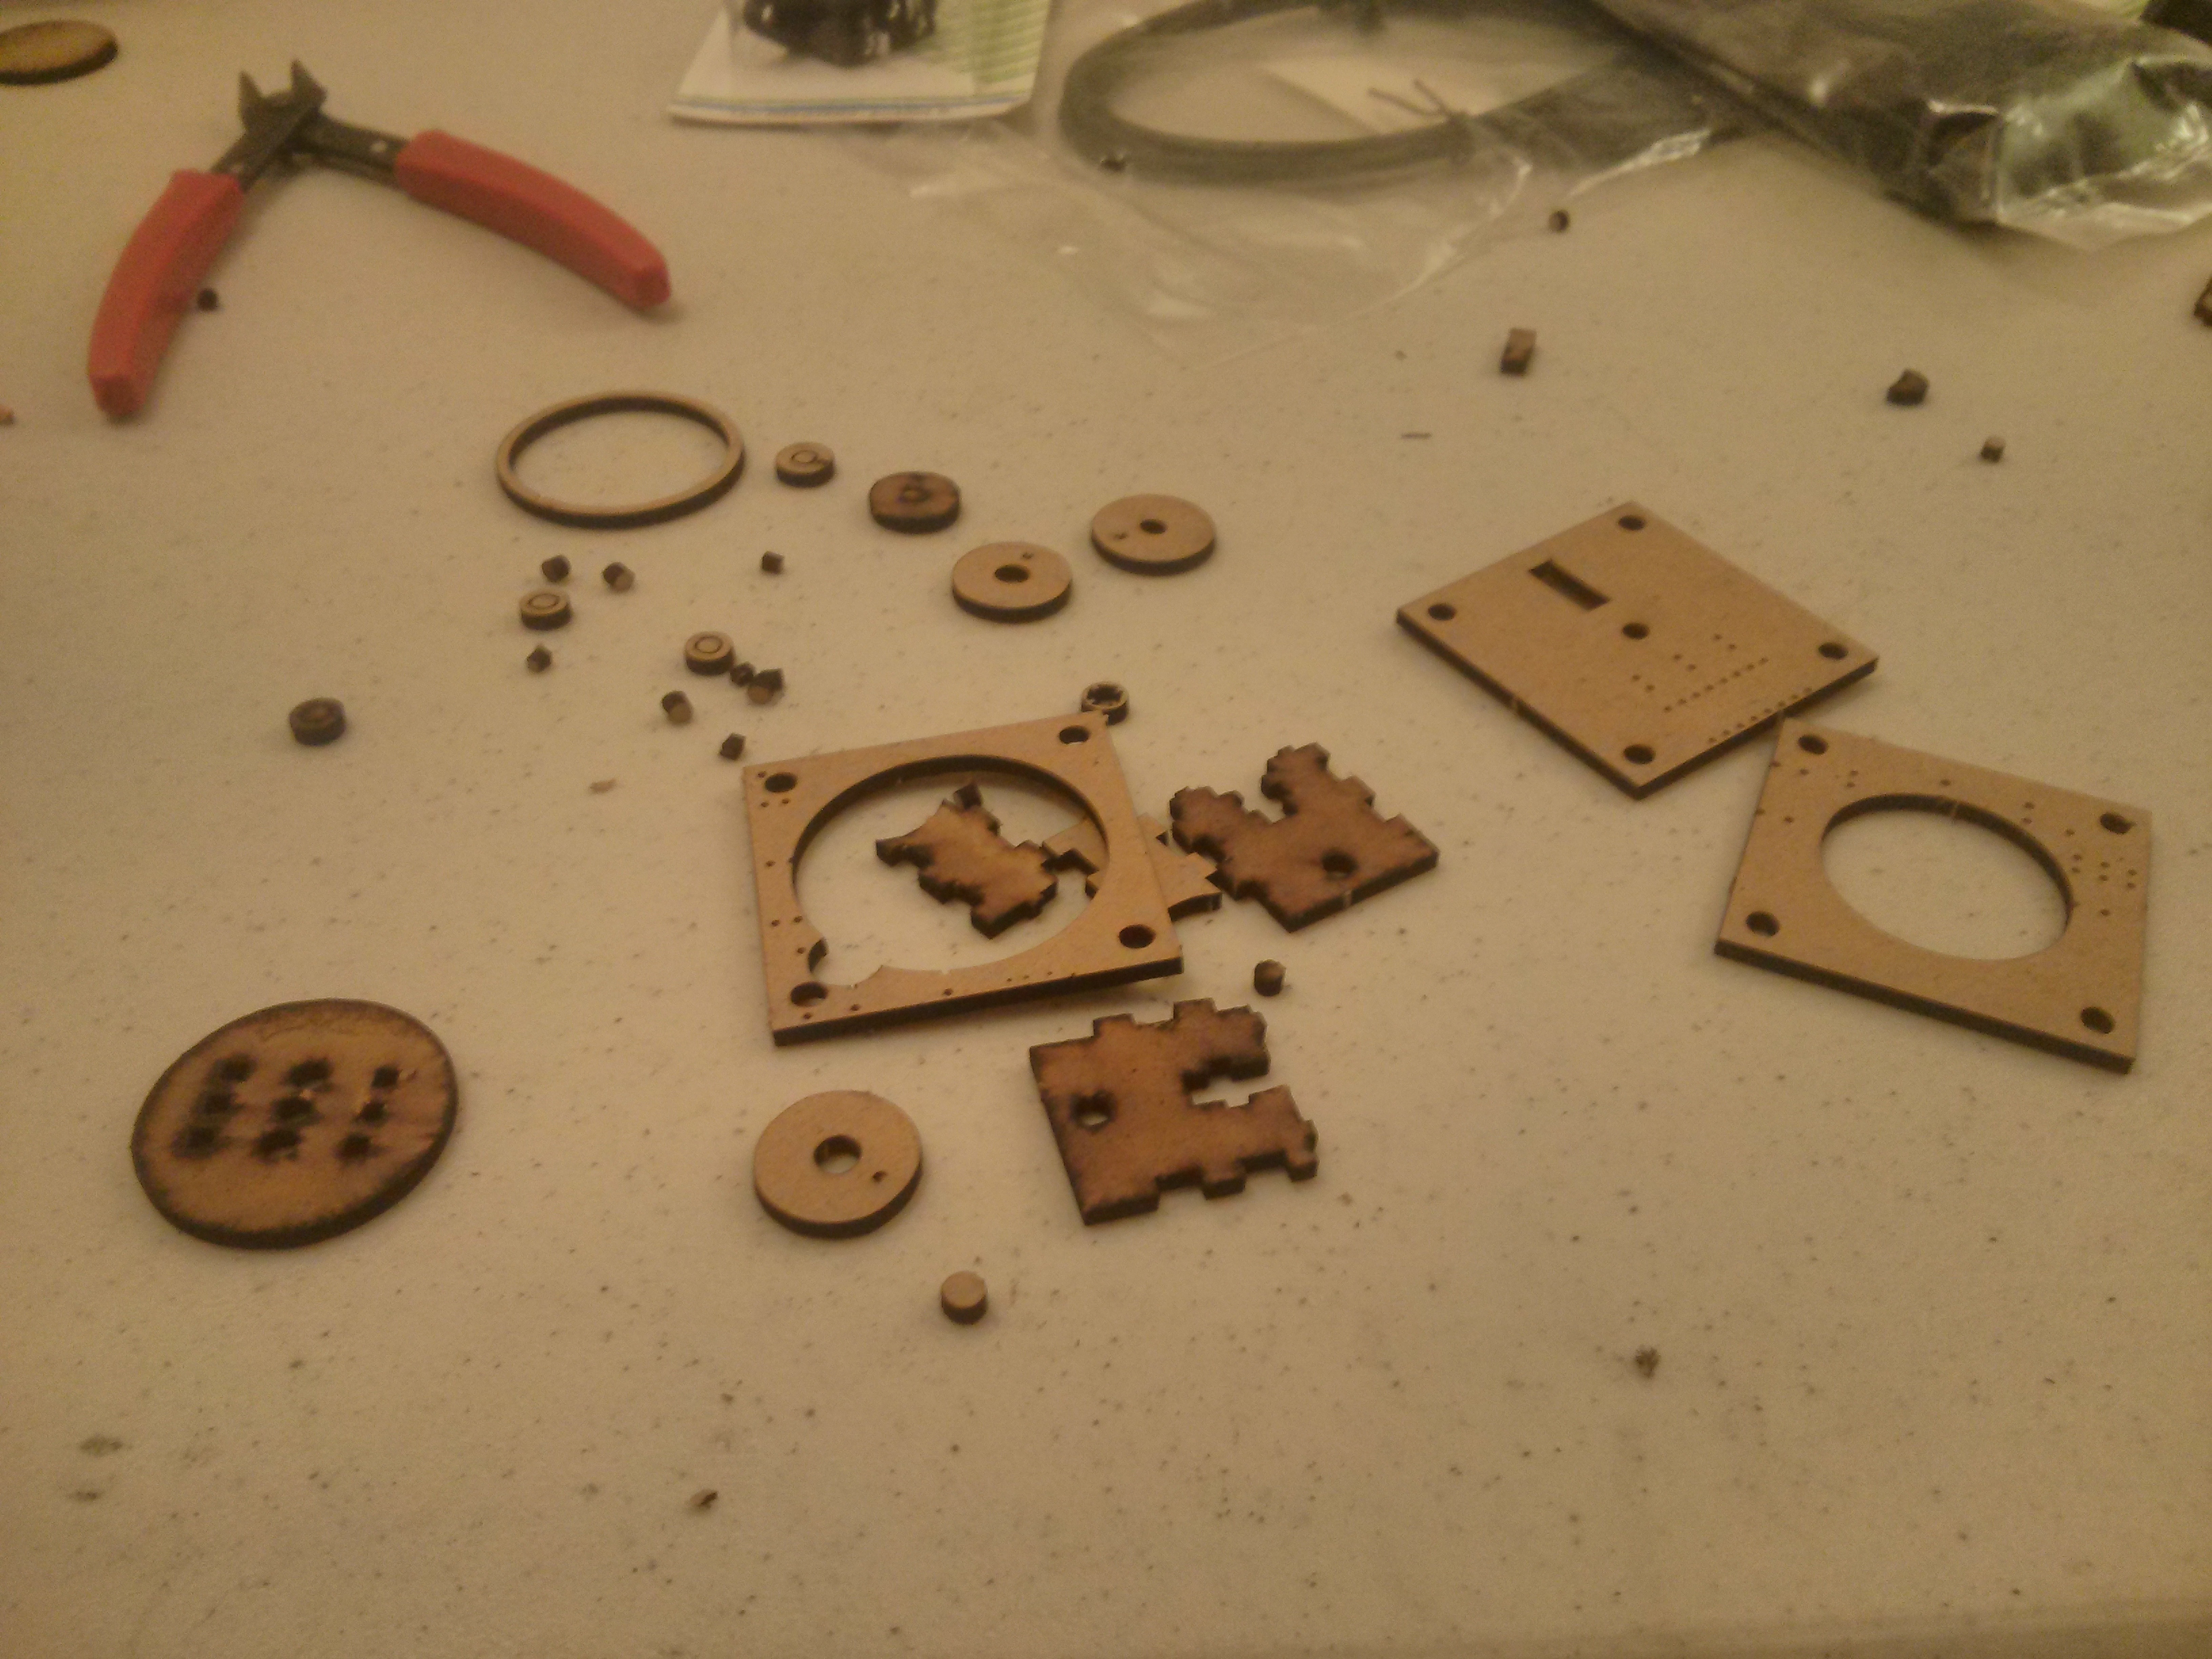
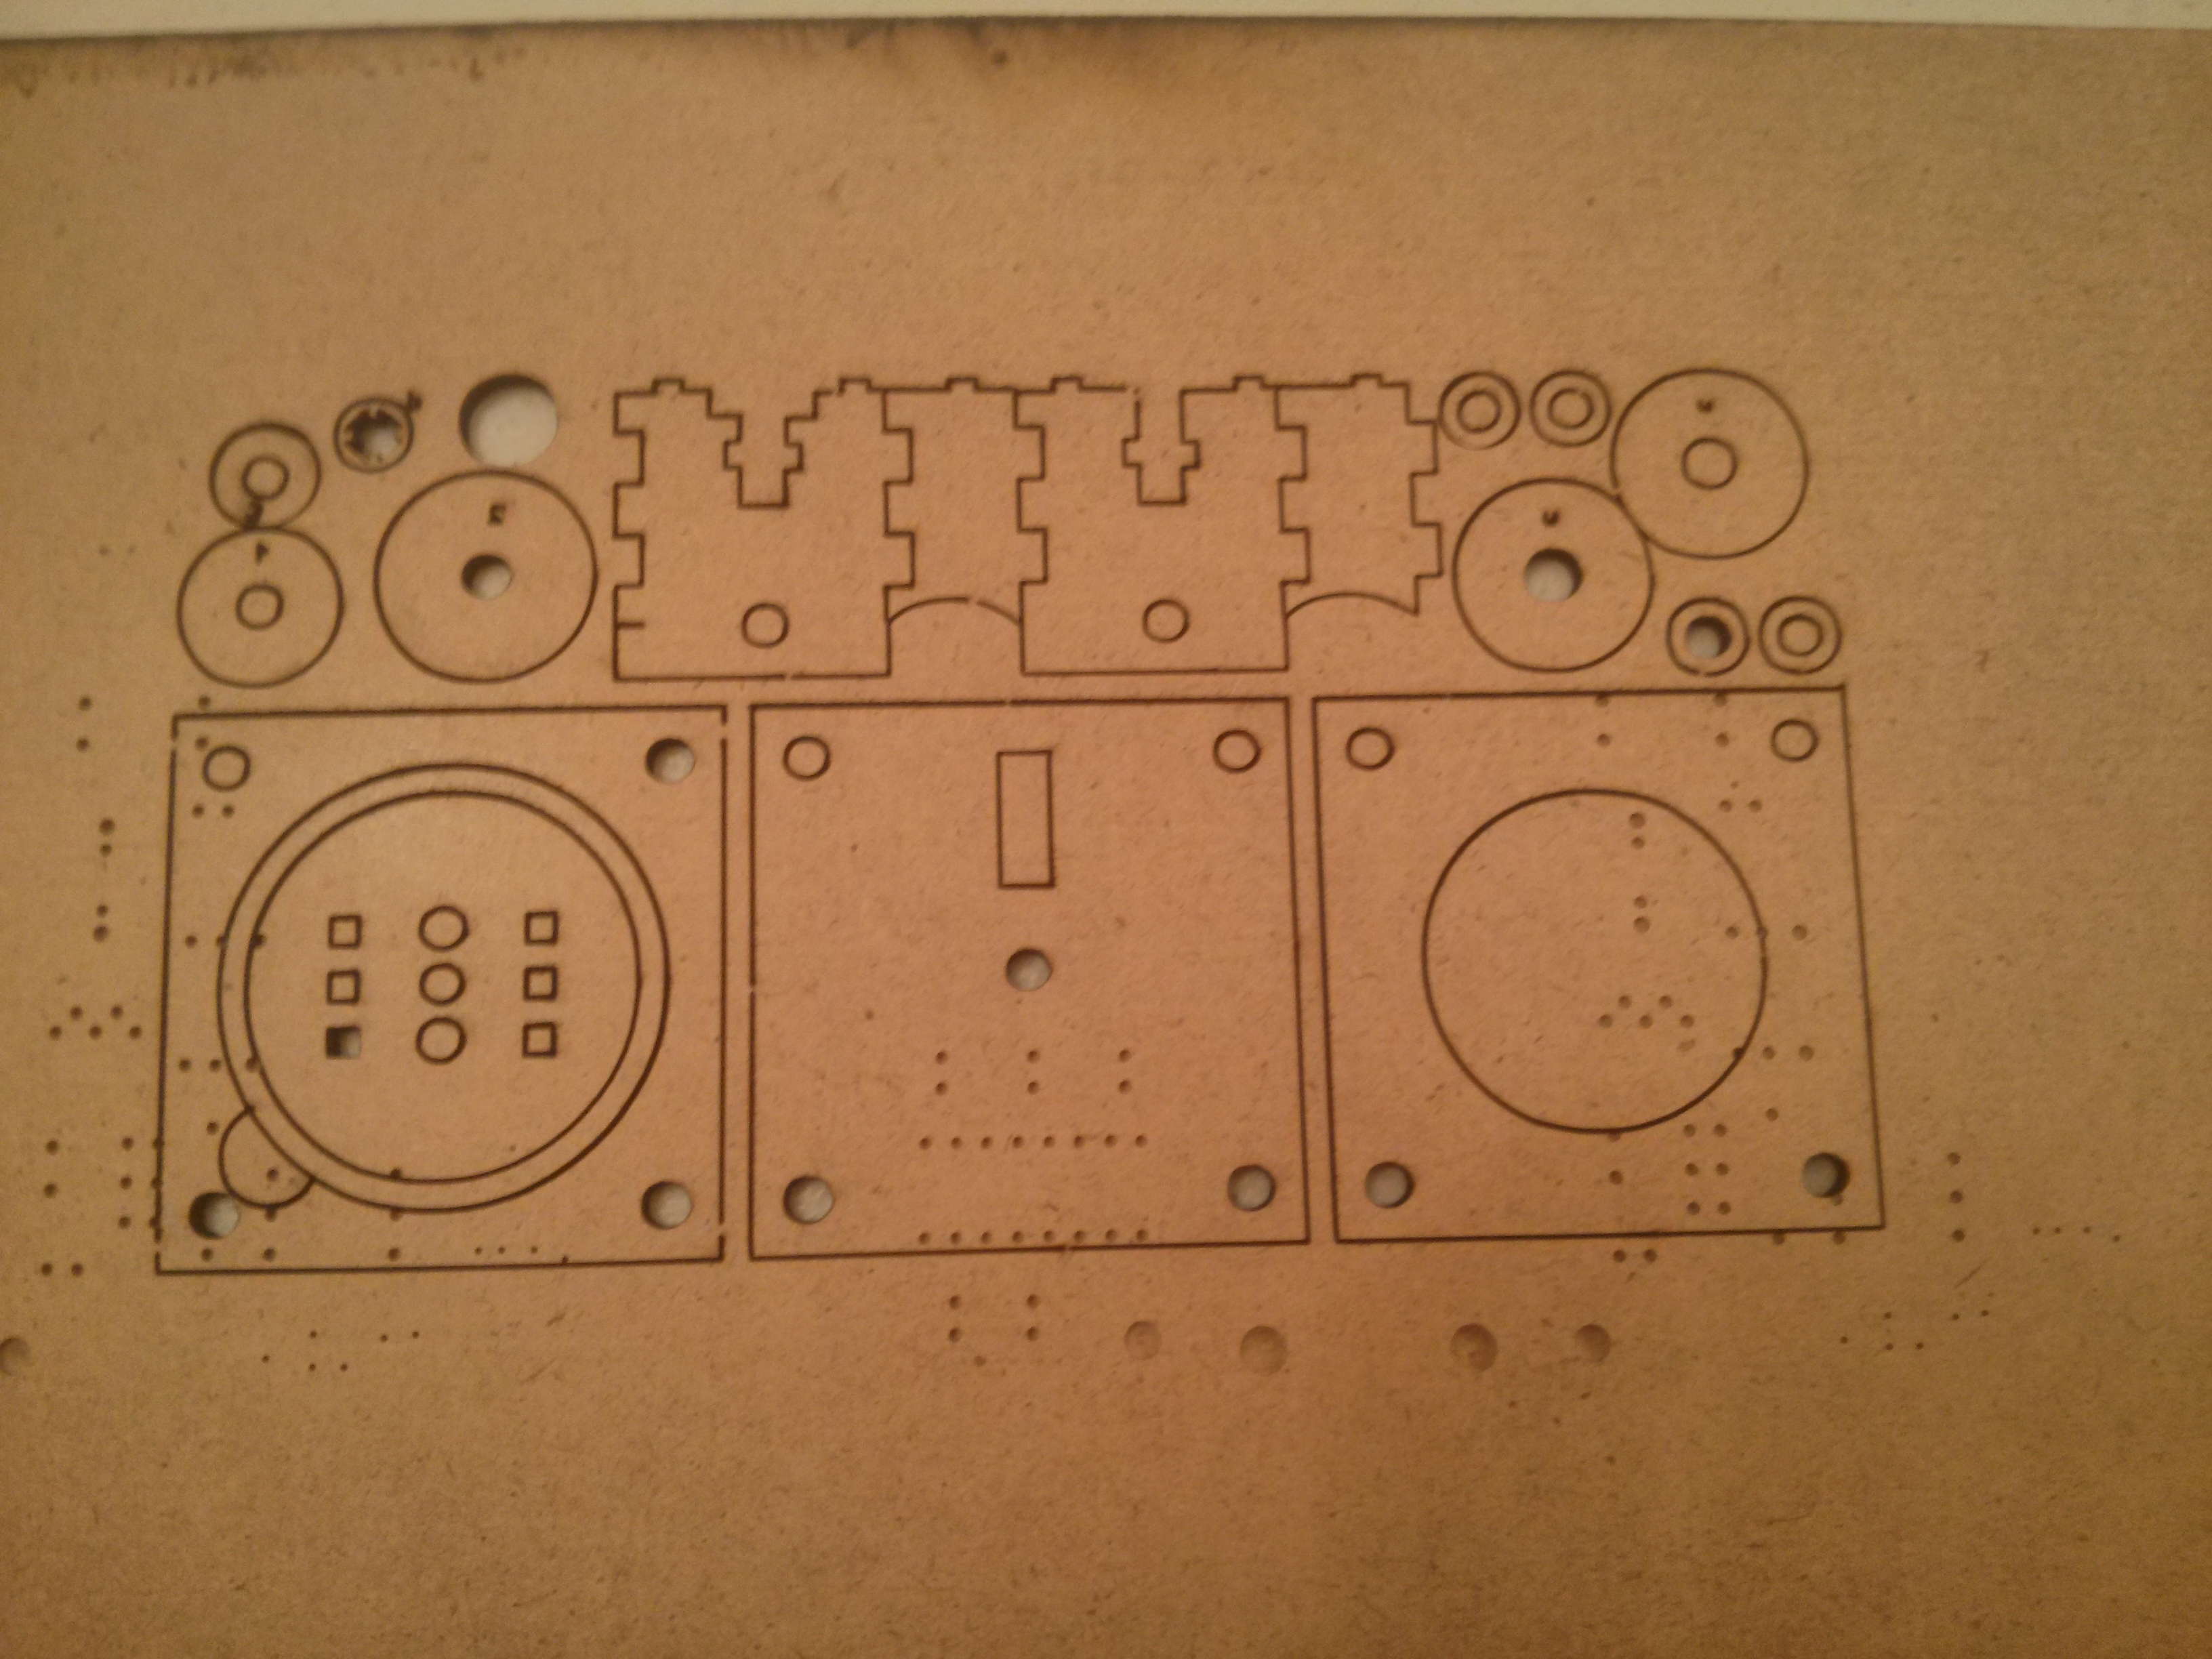
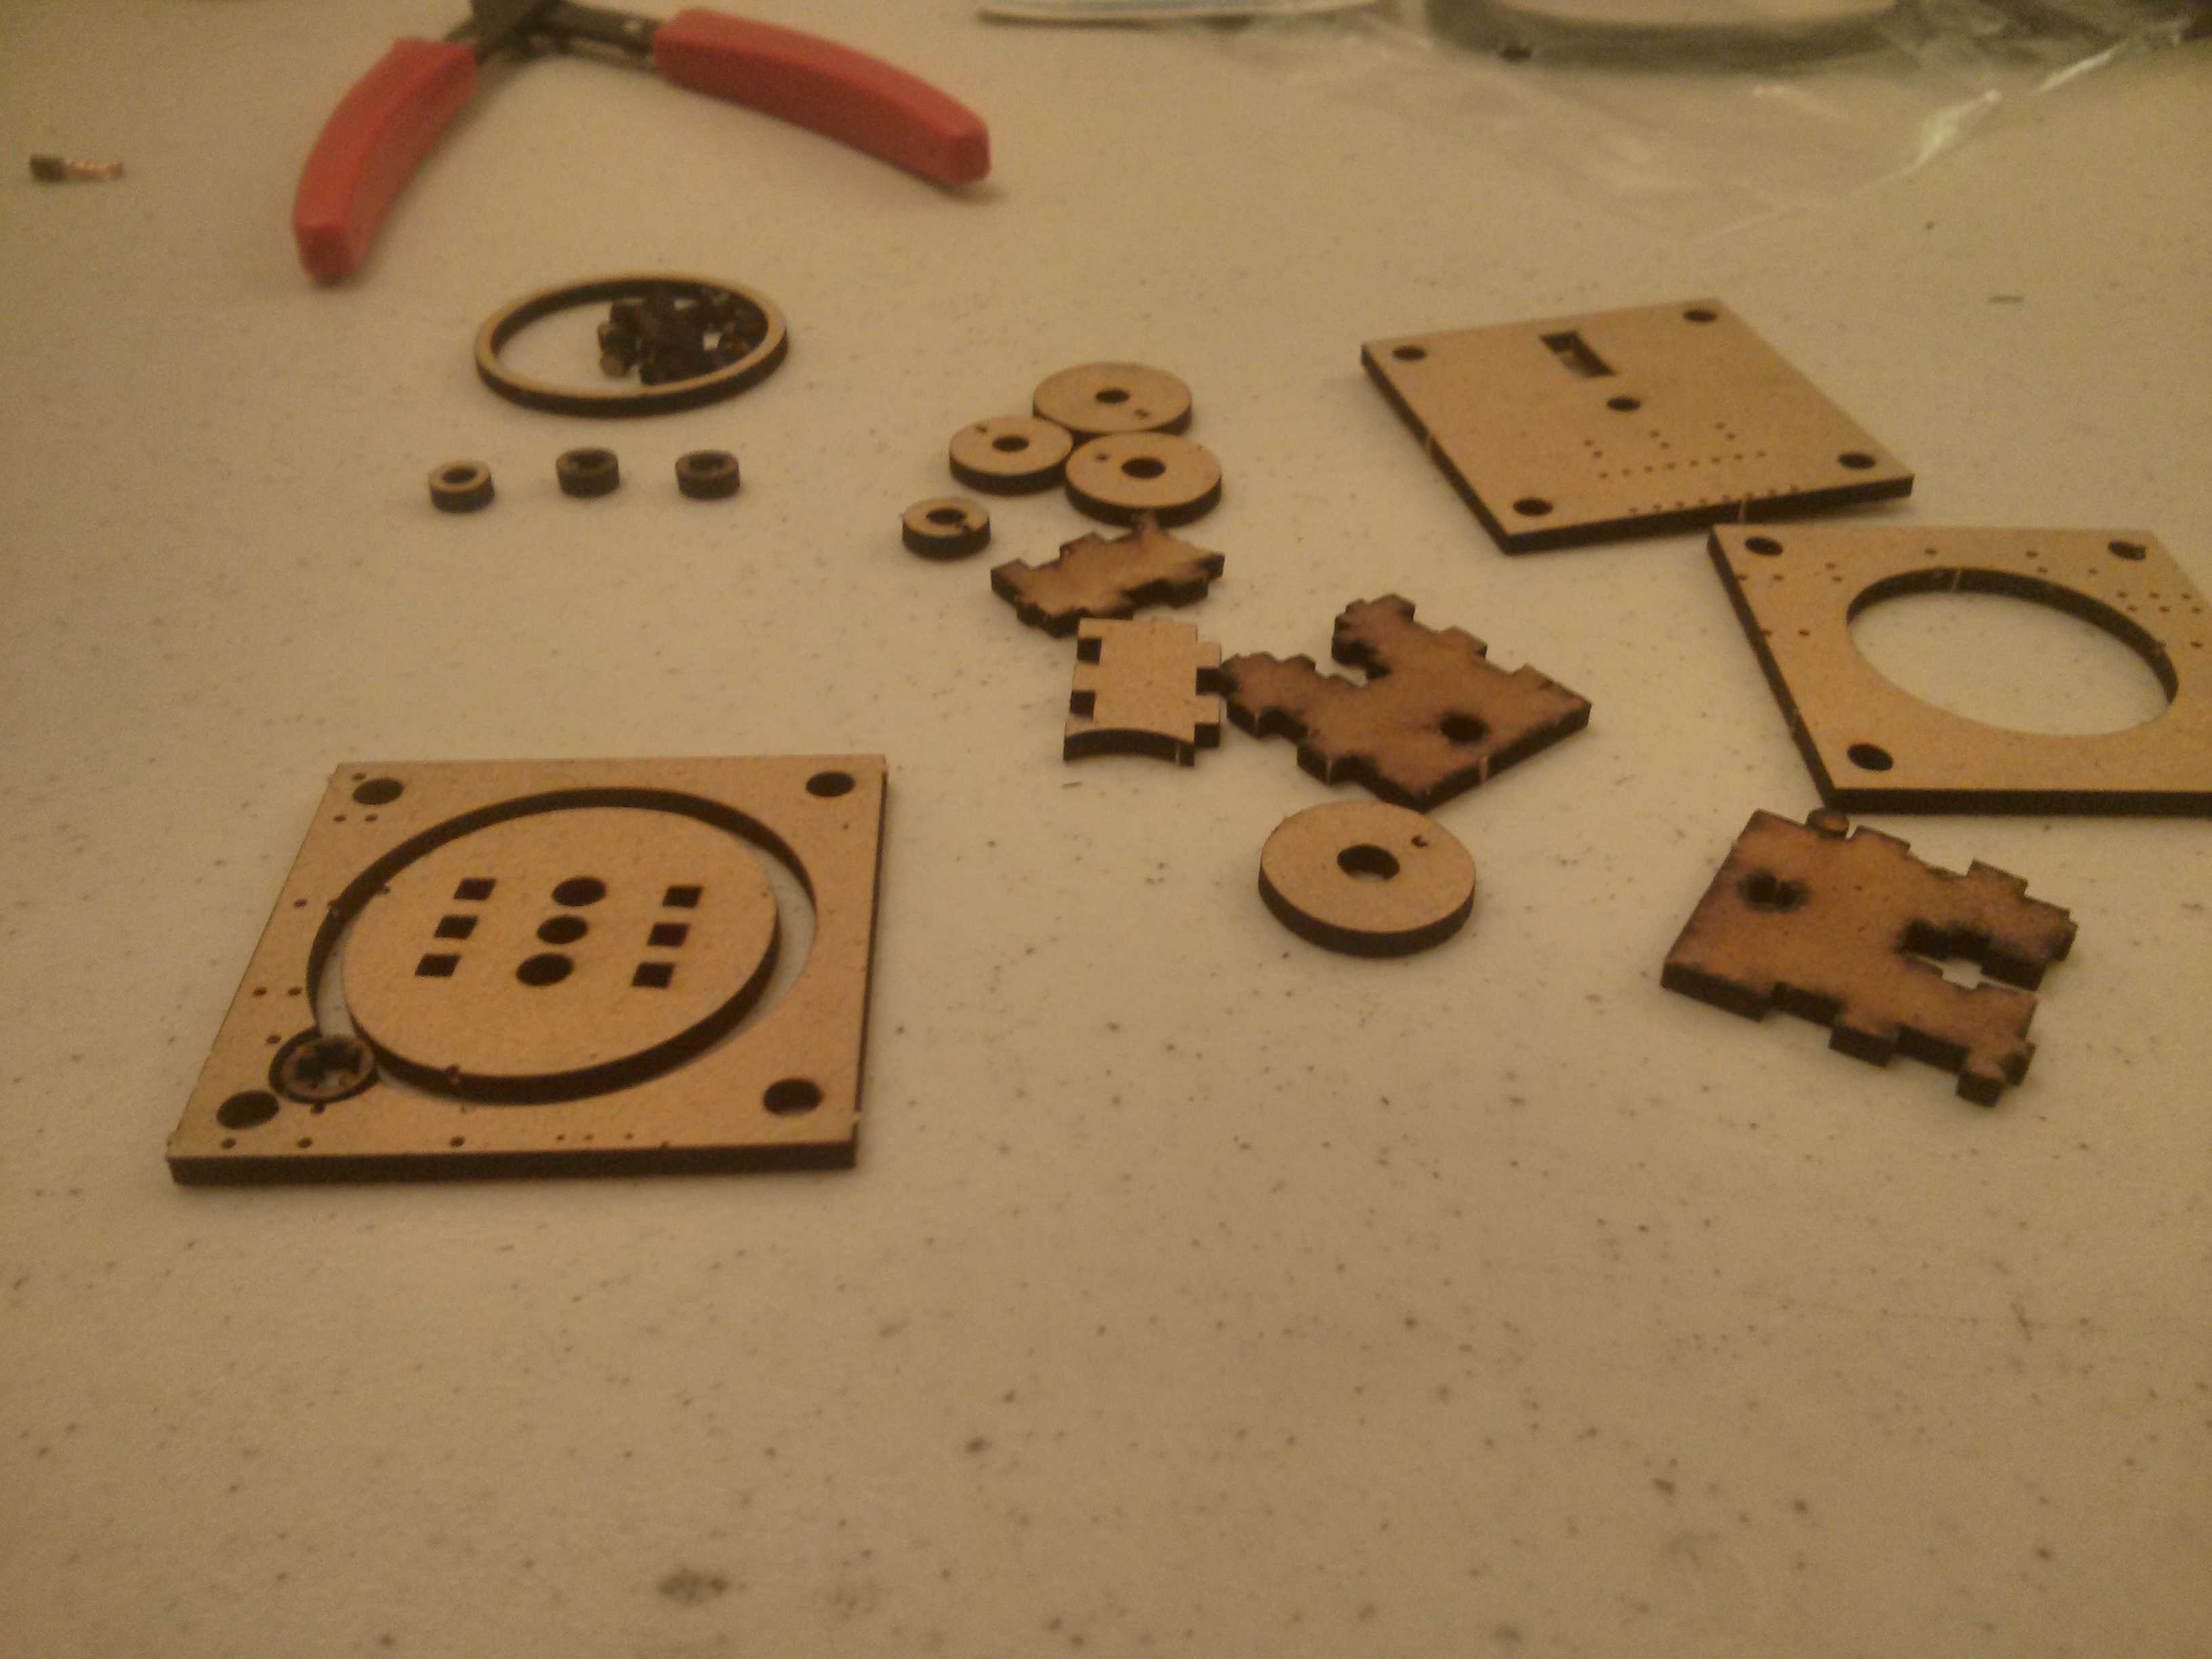 It’s actually a bit smaller than I was really prepared for, so the fallout from mounting holes is roughly the same size as all the parts I’m actively working with. Also, I lost one while carrying it out of the lab. Oops.
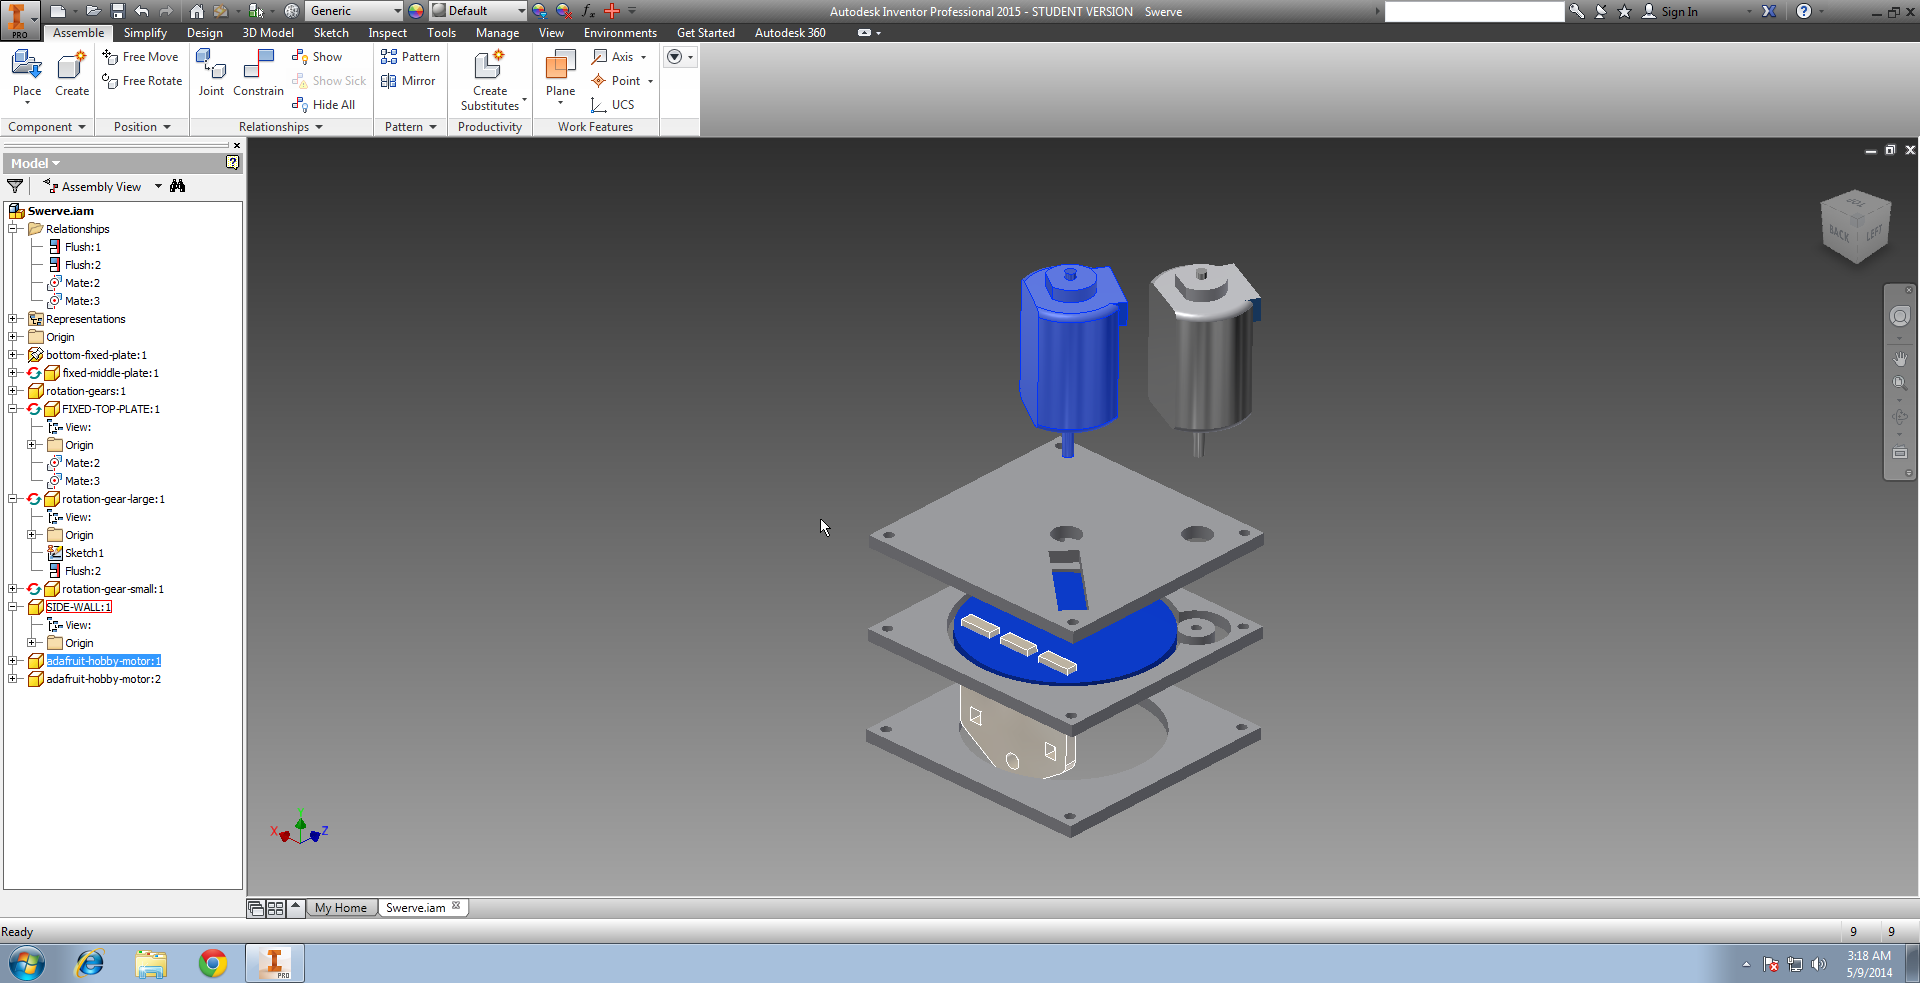
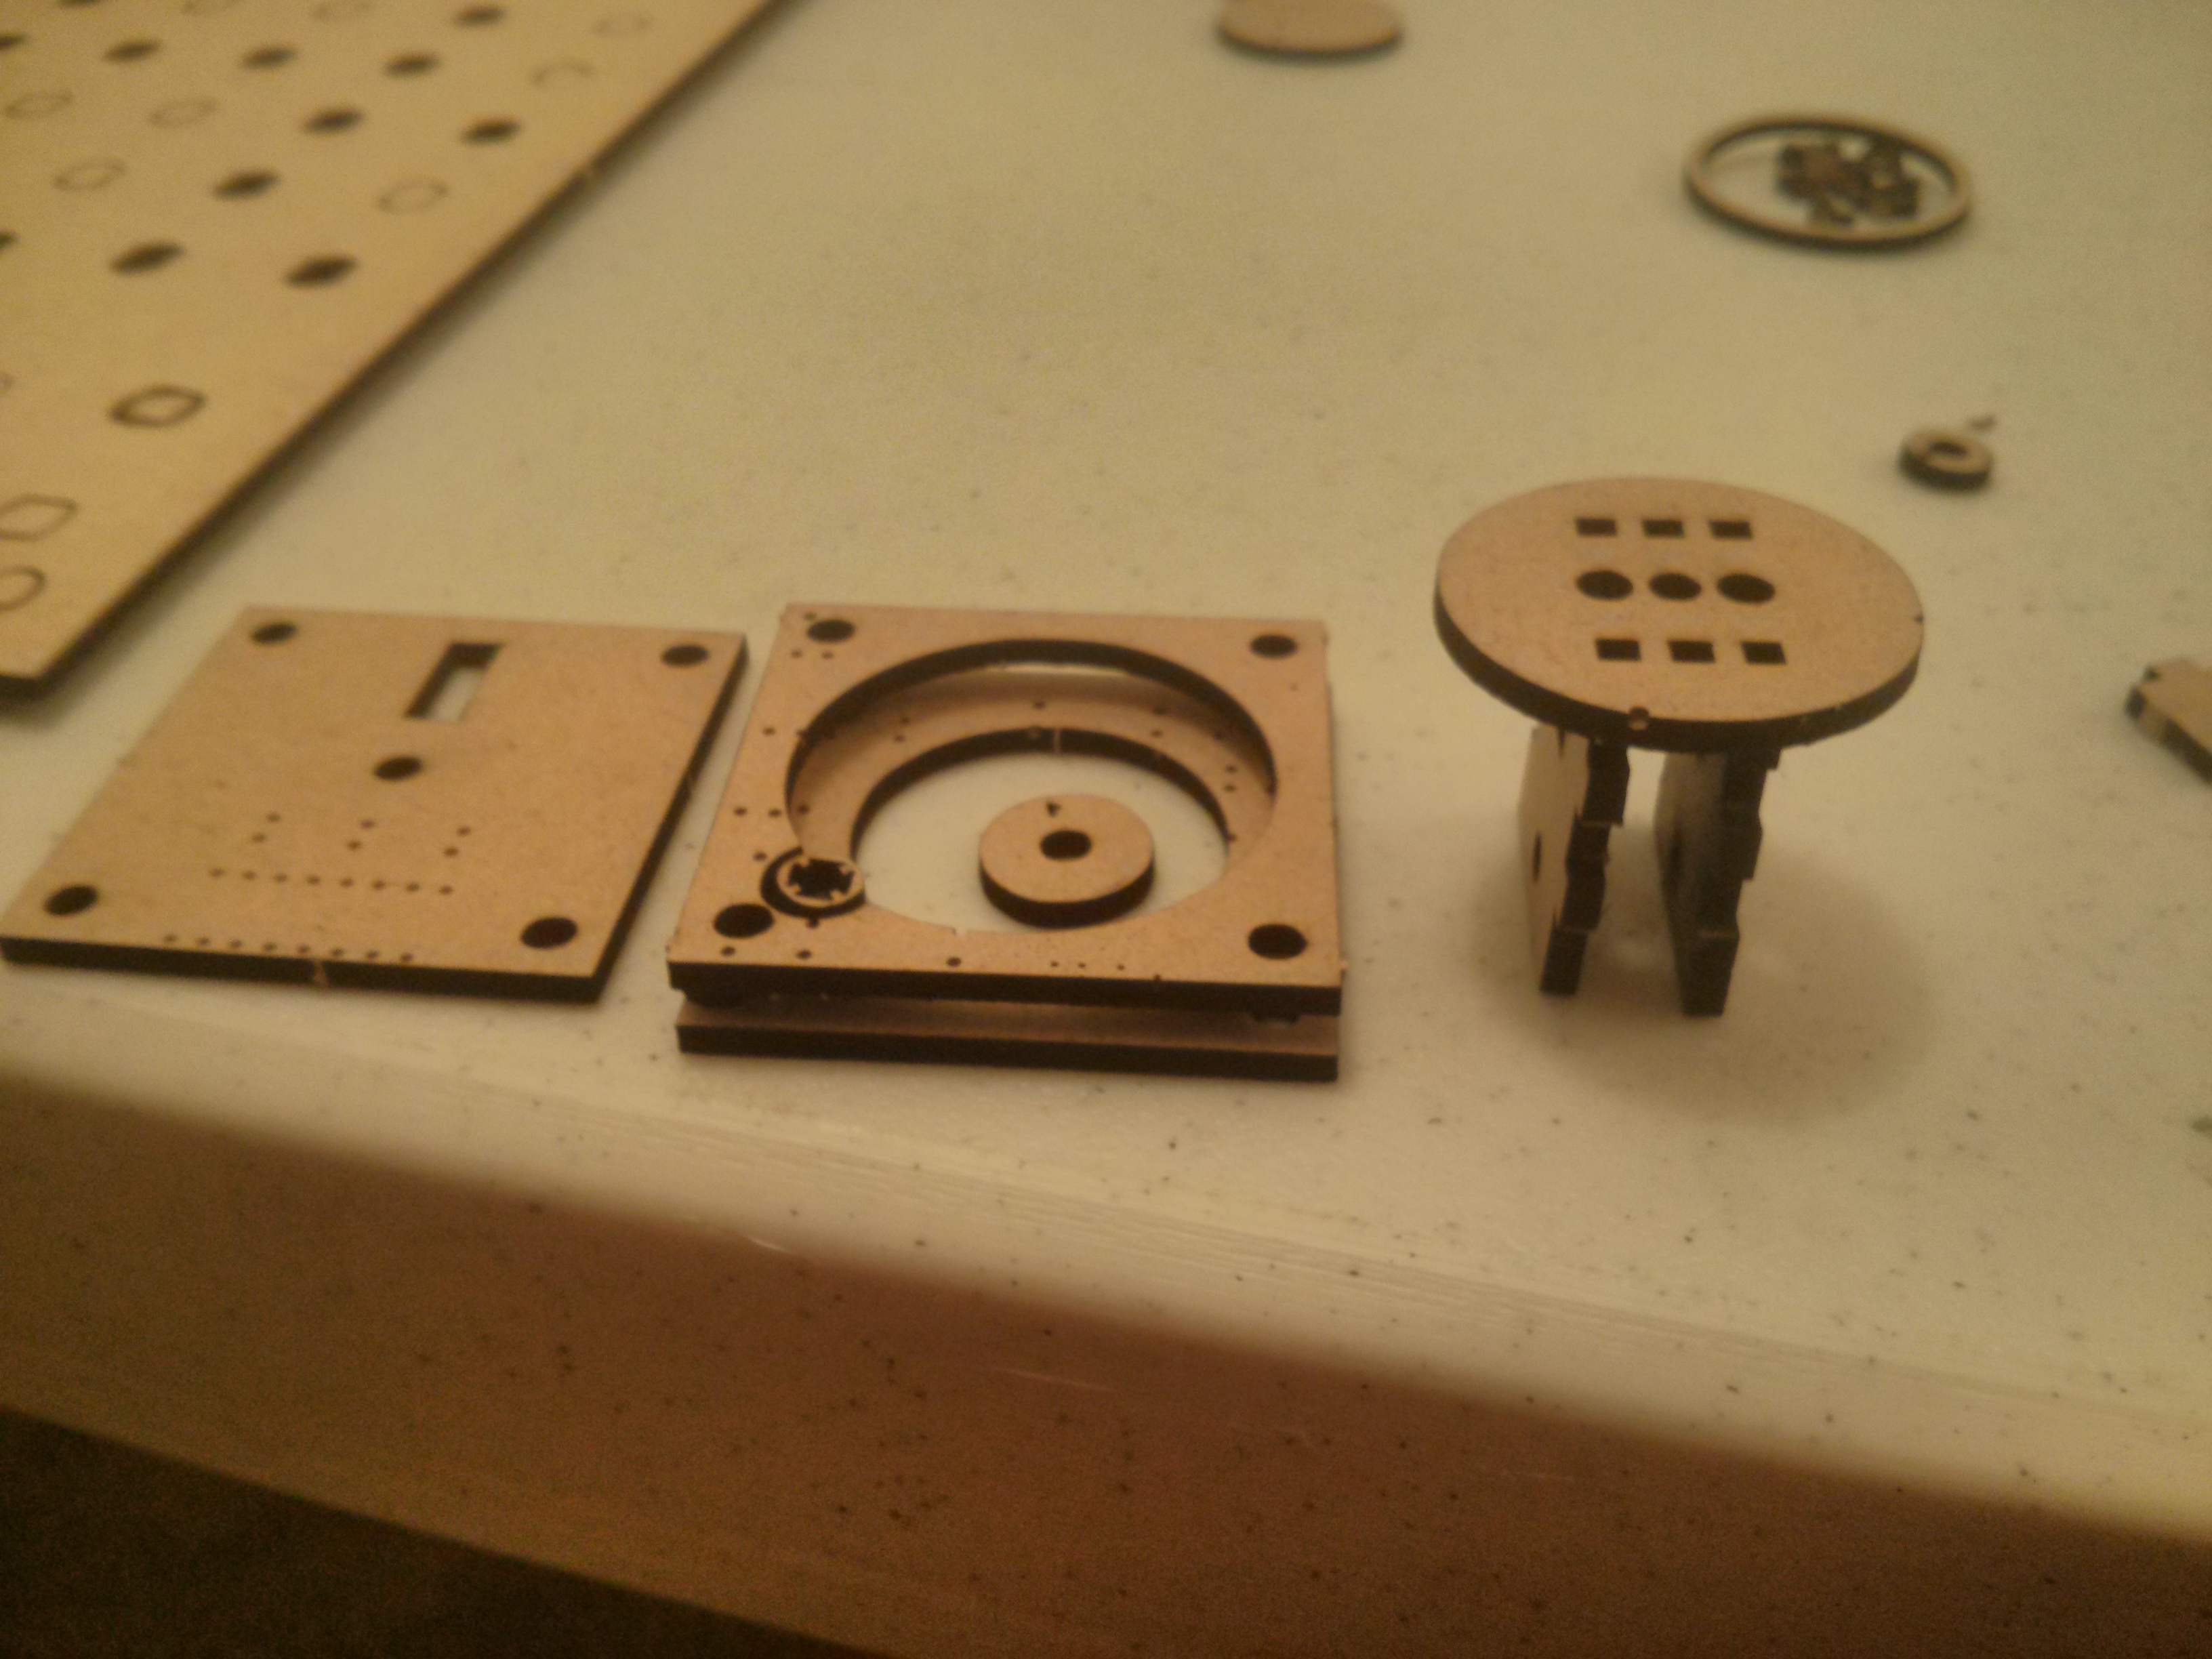 Here’s roughly how the parts would stack, in a pseudo exploded view. The gear on the bottom layer of the central piece would normally be used to drive the wheel, but clearly isn’t going to fit at this scale. I also haven’t bothered with proper gearing yet, due to practical concerns of being difficult to do in Eagle.
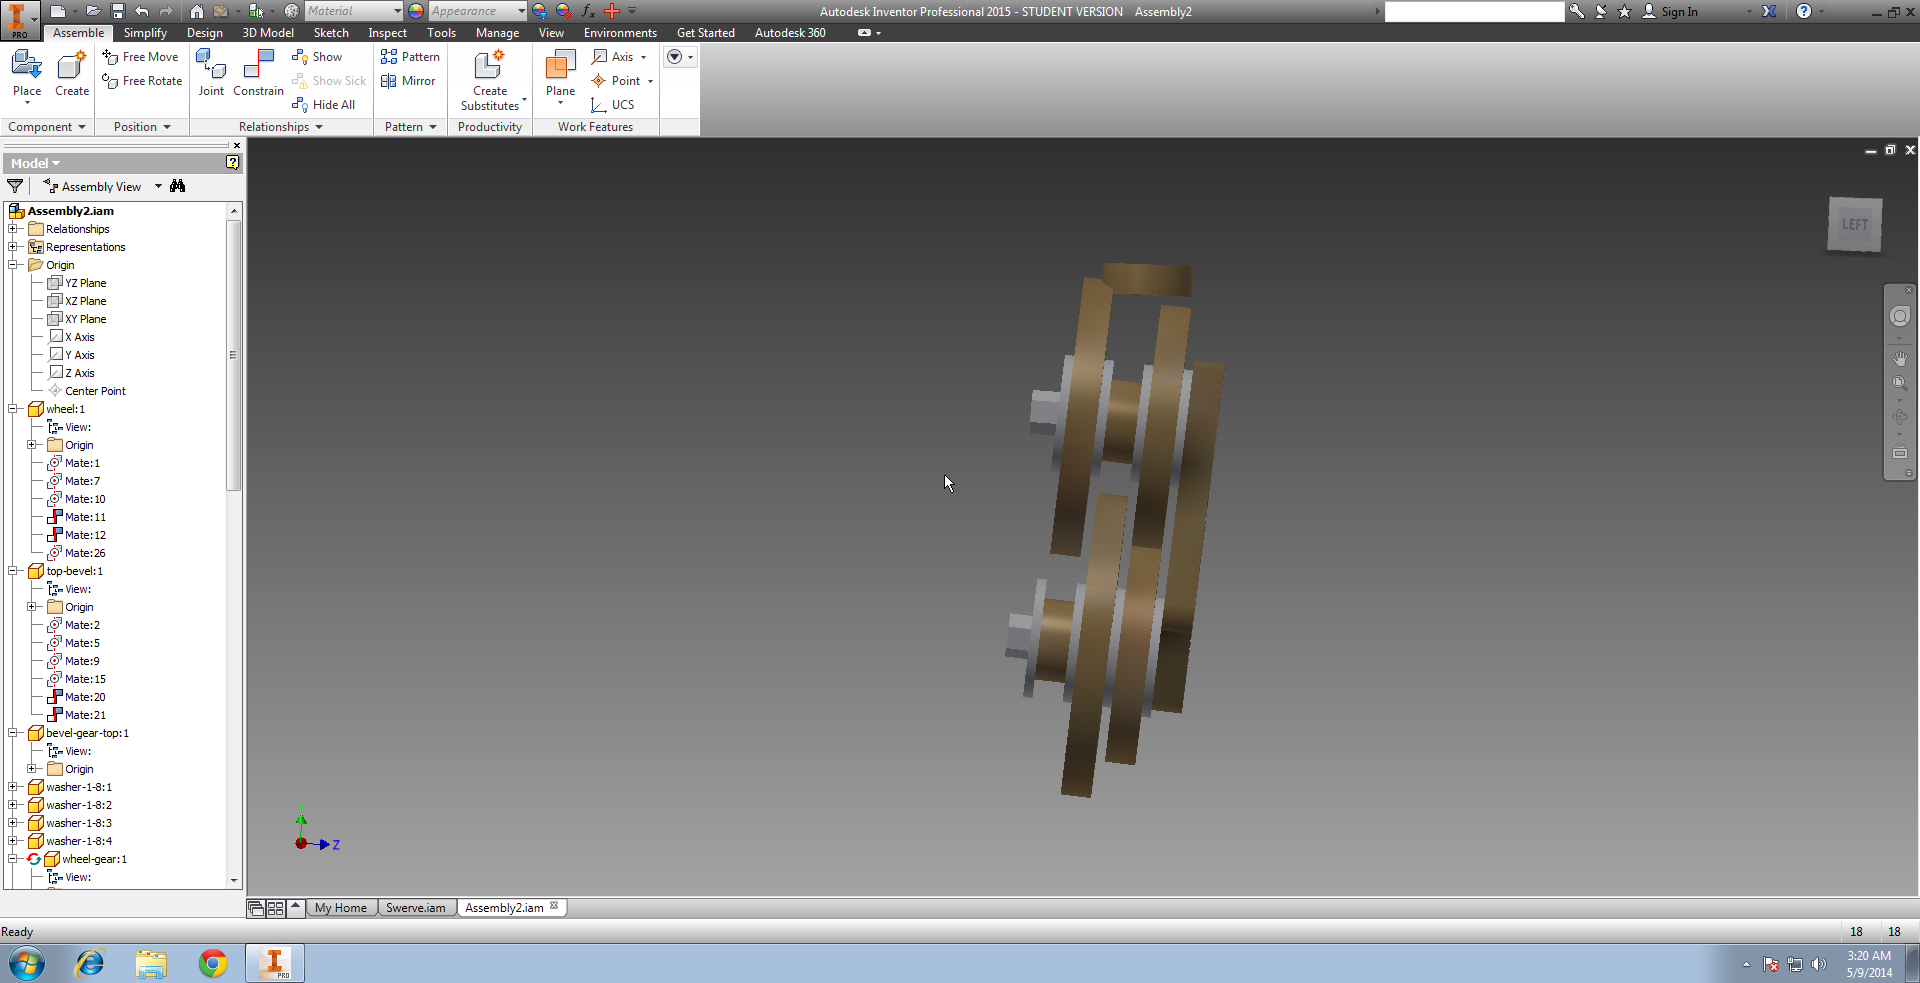
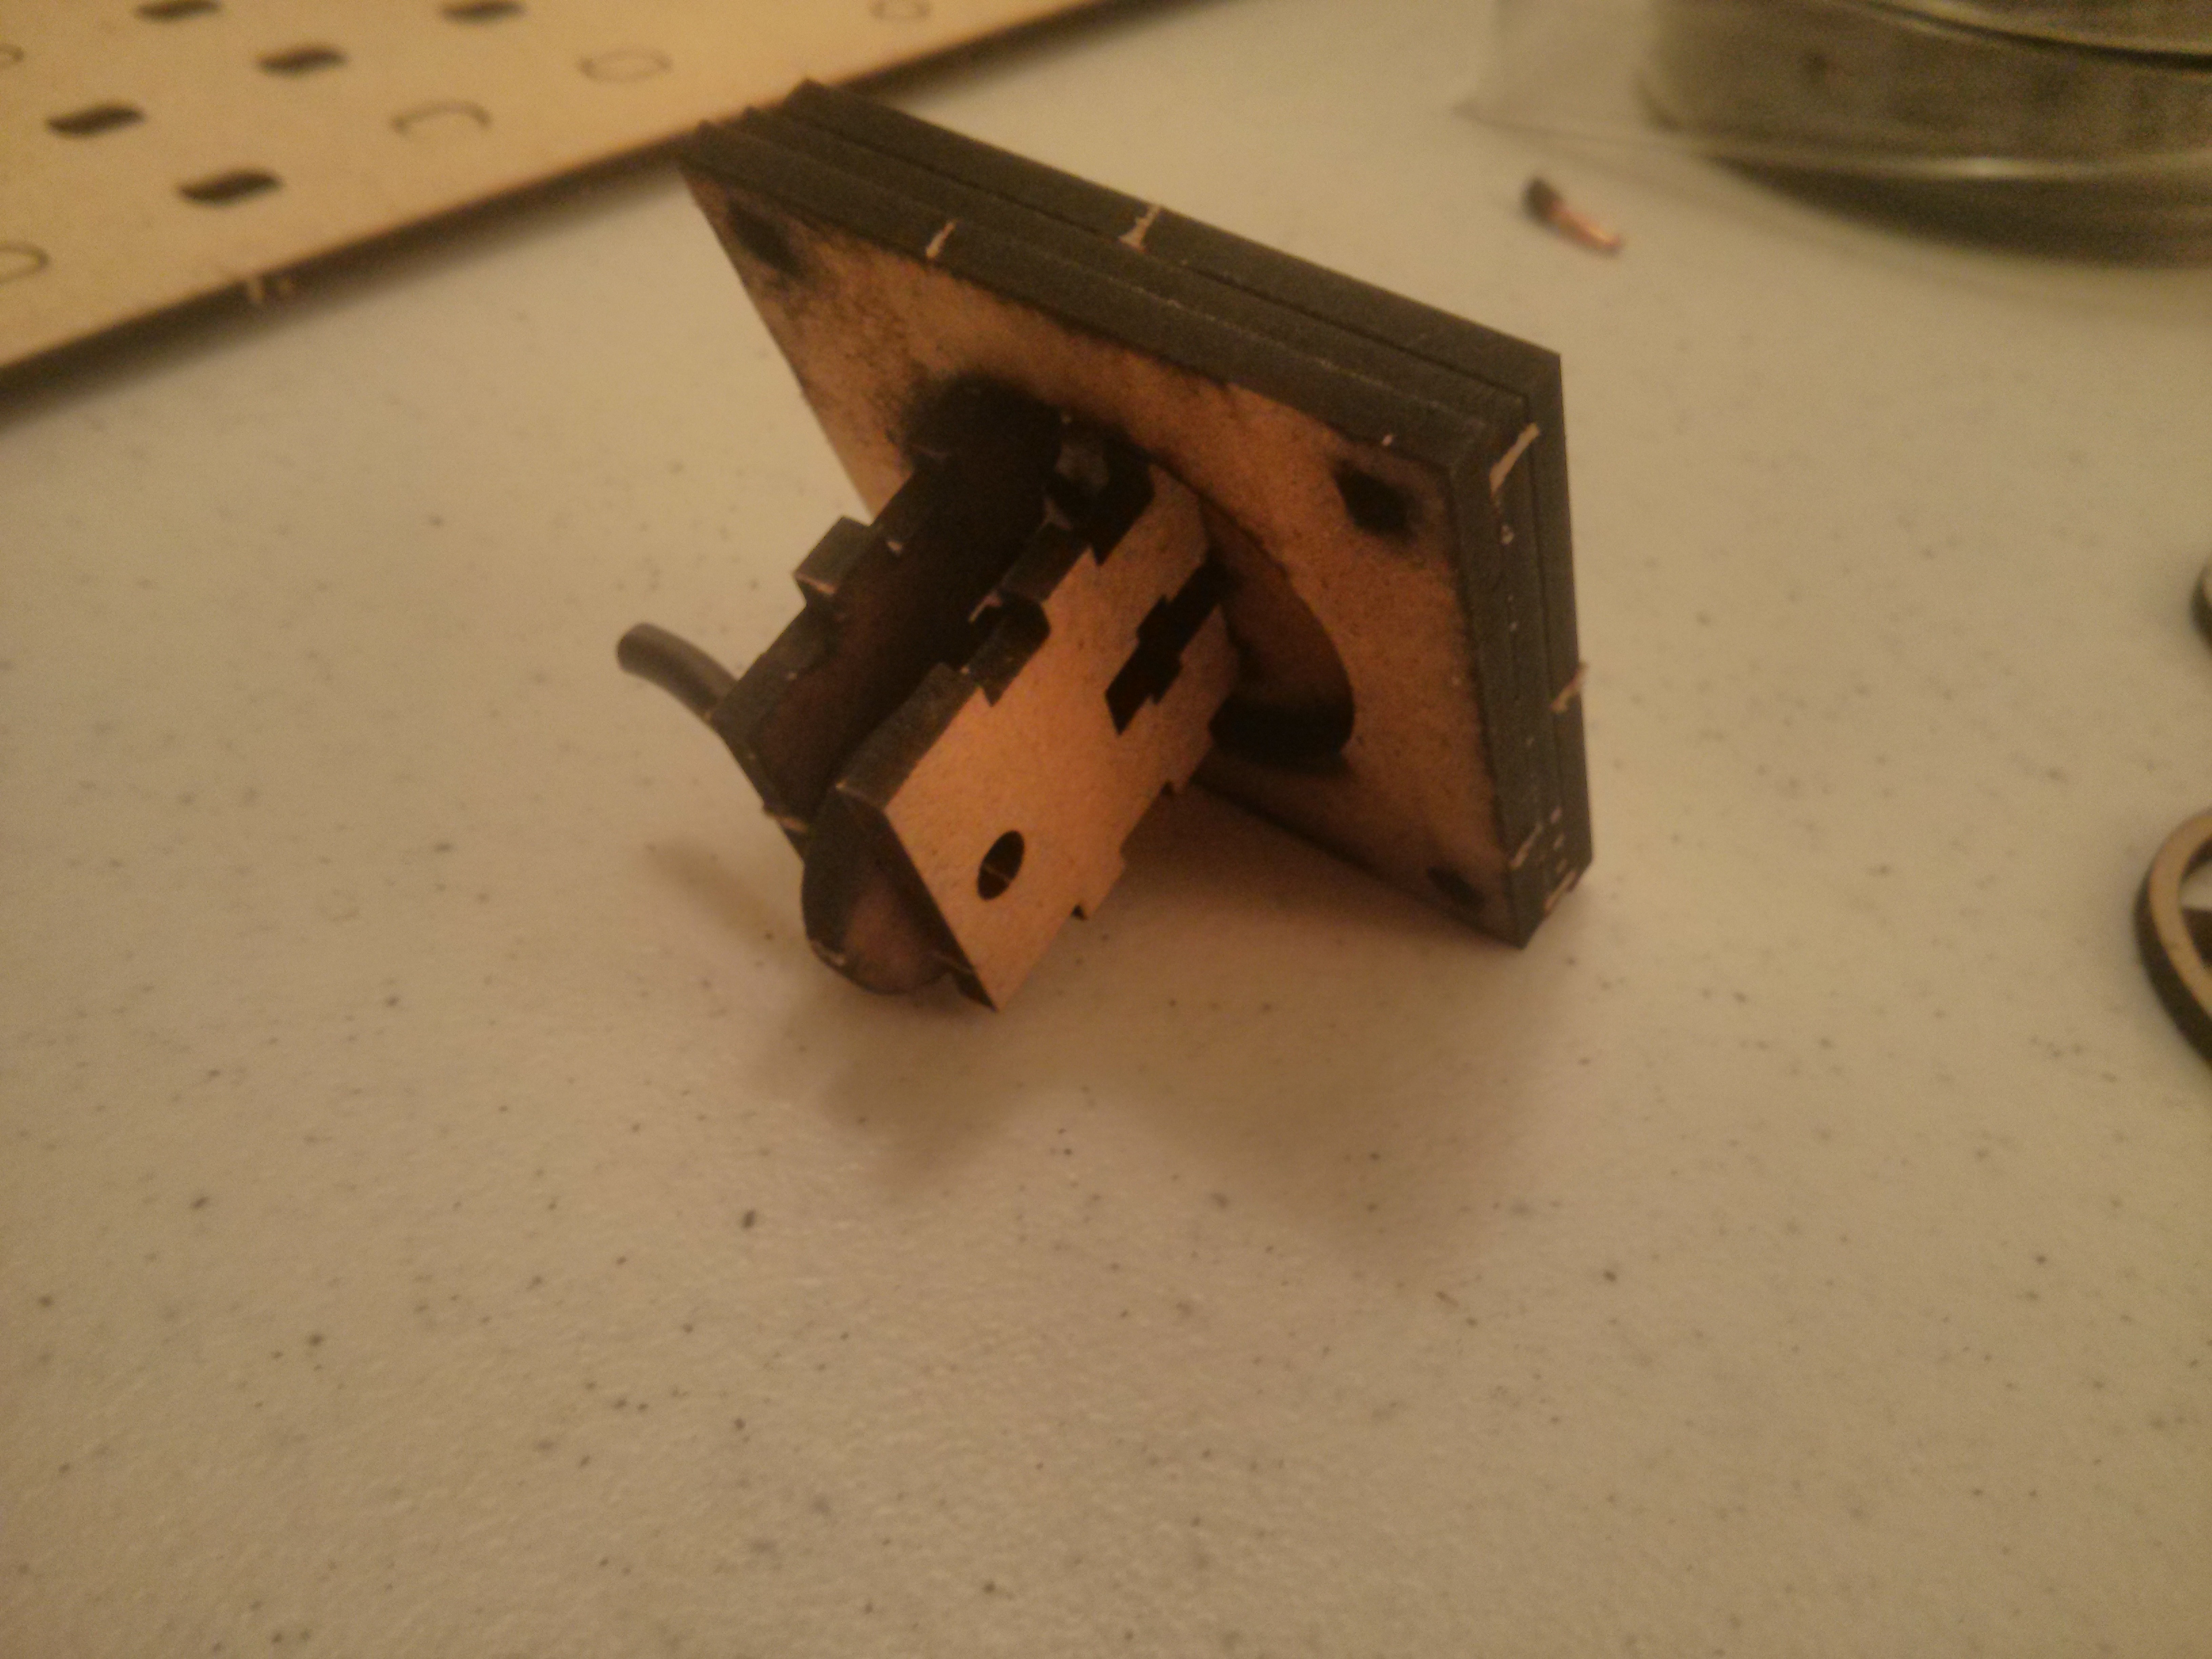 And, here’s how the parts would look if they were actively functional, and jammed into eachother. Since this prototype was built for scale, I can CLEARY see that this is too small. I can’t even actually center it all up, since it’s too narrow. But, for a couple hours time, this is a great start to know what direction I need to head in.
 This is now laser-cutting project number 2 (Number 1 will be written up in the near future), and I’m still learning a great bit about good procedures to make things work well. One of the things I learned on cut number one is leave support tabs. The first model cut alright, but one of the sections got blown out of it’s spot, and was totally ruined. I did a bit of testing with my support tab, and a small 3-5mil gap on a couple sides leaves just enough to not make things fly all over the place, while still popping out with minimal pressure.
The other major lesson learned was that finally I can measure once and cut twice. Because it’s super fast. Which is GREAT. I look forward to more of this.